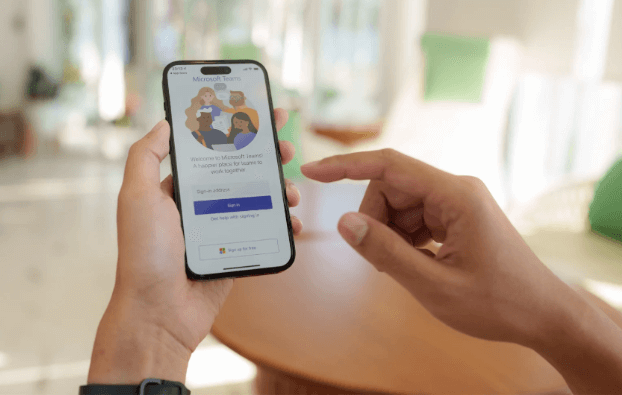
A few weeks ago, we launched our new series of blogs exploring Microsoft Teams and the multiple benefits it can bring to you and your business.
In our last blog of this series, we shared some helpful keyboard shortcuts that we regularly use during our Teams meetings!
This week, we are diving in deeper into Microsoft Teams functionality, and sharing 10 helpful tips that you can use to help you host your next Teams meeting!
So, without further ado, lets kick things off with tip number 1!

1. INVITE A WHOLE TEAM TO MEETING.
Our first tip will be helpful to those who regularly arrange meetings for specific teams and groups of people.
When setting up a Teams Meeting, you could invite individuals from a team to a meeting, however, this can be time consuming if you are inviting a large group of people.
To rectify this, you can instead invite an entire team of people instead of selecting each individual member, saving you valuable time.
To do this, simply type in the name of the team in the invitation bar and select the team name.

The meeting invitation will then be sent out to everybody who is part of that team.
To edit who is part of this team, simply go to the Teams tab and select on the ellipsis next to the team you would like to edit and select ‘Manage Team’. From here you can see all the team members and add/remove individuals.

2. ADJUSTING MEETING OPTIONS
After you start your Teams meeting, you may want to quickly adjust the meeting options.
To access the meeting options, go to the top bar and select the integrated ellipsis button and click on the ‘meeting options.’

In previous versions of Microsoft Teams, you could only access the meeting options outside the meeting, however, this is now integrated and can be edited within the meeting itself.
Within the meeting options menu you can adjust settings such as,
- Who can bypass the lobby
- Who can present
- Allow attendees to unmute

3. LAST MINUTE INVITATIONS AND SHARING A MEETING LINK
Did you forget to invite somebody to your meeting? Want to quickly add others to your meeting at last minute?
To do this, go to the top bar and select the ‘participants’ button to open the participants pane.
From here, you can simply type in the name of an individual into the ‘Type a name’ search box, and this will send out an invitation to those within your organisation.
Alternatively, you can select the link button next to the ‘Type a name’ search box, and this will copy a join link to your clipboard.
You can then paste this join link into an email or message and send this to anybody else who you would like to join your meeting.

4. MANAGING ATTENDEE PERMISSIONS
Earlier, we explored how you can adjust your meeting options. However, you can also quickly change an individual’s permissions during a meeting.
For example, you may want to quickly change the permissions of one of your attendees so that they can present or share their screen.
To rectify this, hover your mouse over your attendee and select on the ellipsis on the right side.
In the drop-down menu you can now select the ‘Make a presenter’ button and this will allow you to change the role of your attendee and make them a presenter.
5. REQUEST SOMEONE TO JOIN
Still waiting for attendees to arrive at your meeting?
Microsoft Teams can allow you to be more assertive to get latecomers to join your meeting.
To do this, hover over the participant with your mouse, and select the ‘request to join’ button.

When you do this, the participant will receive a prompt notification at bottom right of screen requesting that they need to join the meeting.
6. SEND URGENT NOTIFICATION
If you need to get the attention of somebody whilst in a meeting, you can send them an alert that will pester them up to 10 times until they respond.
To do this, go the to top bar and select the ‘show conversation’ icon, and this will open the meeting chat on the right side.
At the very bottom there is an explanation point, when you click on this it will display 3 different options.

By pressing ‘standard’ or ‘important’, this will send a notification in the Teams chat to your attendees.
If you press the ‘urgent’ button, this will send a message and notification to your recipients every 2 minutes for 20 minutes until they arrive at your meeting or respond to your message.
7. SHARING YOUR SCREEN & PRESENTER MODE
As the host of the meeting, you may want to present a PowerPoint presentation or share your screen with your meeting attendees.
To do this, simply select the ‘Share’ button at the bottom of your screen.
From here, this will open a menu where you can choose to select a specific desktop, screen or application you have open.

- Selecting ‘desktop’ lets you show everything on your screen.
- Selecting ‘window’ lets you show a specific app.
- Selecting ‘PowerPoint’ lets you show a presentation.
- Selecting ‘browse’ lets you find the file you want to show.
After you select what you want to show, a red border will surround your screen, indicating that you are now sharing with your meeting attendees.
Once you are finished, select the ‘stop sharing’ button to stop.
8. ADDING A SPOTLIGHT SPEAKER
During your meeting, you may want to set a spotlight speaker meaning that the video feed will only focus on one participant even if somebody else is speaking.
To set a spotlight speaker, you can do this by hovering over participant with your mouse and select the ellipsis on the right.
In the drop-down menu click on the ‘spotlight me’ option and this will set this participant as a spotlight speaker.

When you do this, a message bar will appear at top of video feed stating who is currently the spotlight speaker.
Once your spotlight speaker has finished presenting, you can click on the ‘exit spotlight’ button in top bar.

9. DOWNLOADING A MEETING ATTENDANCE REPORT
During your meeting, you can download an attendance report to keep track on who came to your meeting.
To do this, select the participants pane on the top bar and click on the ellipsis on the right-hand side of the ‘Participants’ Title.
This will open a drop-down menu, to which from here you can select the ‘download attendance list’ button.

Doing this will open up an excel attendance report spreadsheet which will provide information on who attended the Teams meeting, as well as the time stamps for when participants joined and left the meeting.
10. LEAVING OR ENDING A MEETING
Once your meeting has finished you will now have the option to either leave the meeting or end the meeting for all participants.
As host, you may want to just leave the meeting and let others continue with their discussions. To do this, click on leave meeting
Alternatively, you can end the meeting for everybody by selecting the drop down on the right and selecting end meeting. This will kick everybody out of the meeting.

THAT’S ALL FOLKS!
We hope you found these tips helpful and that you might be able to implement some of these in your next Microsoft Teams meeting!
If you would like to make the most out of this fantastic piece of software, look out for our next blog where we will be exploring more helpful tools a tricks you can use in your next Teams meetings.
If you would you like to find out more information about Microsoft Teams and its numerous benefits, check out our website.
If you have any further questions or would like some advice on how you and your business can make the most out of the platform, please don’t hesitate to contact our friendly support team.


